
Things you need:
1= galvanized pipe (with thread on both ends) 1/2 inch diameter x 5 feet long
1= galvanized pipe (with thread on both ends) 1/2 inch diameter x 1 foot long
1= 1/2 inch pipe end cap
1= 1/2 inch pipe flange
1= 1/2 inch pipe 90º elbow
1=3/4 x 20 x 11 inch solid wood or plywood
1= 3/4 x 3/4 x 60 inches long wood (base trim)
4= wood screws
Nails
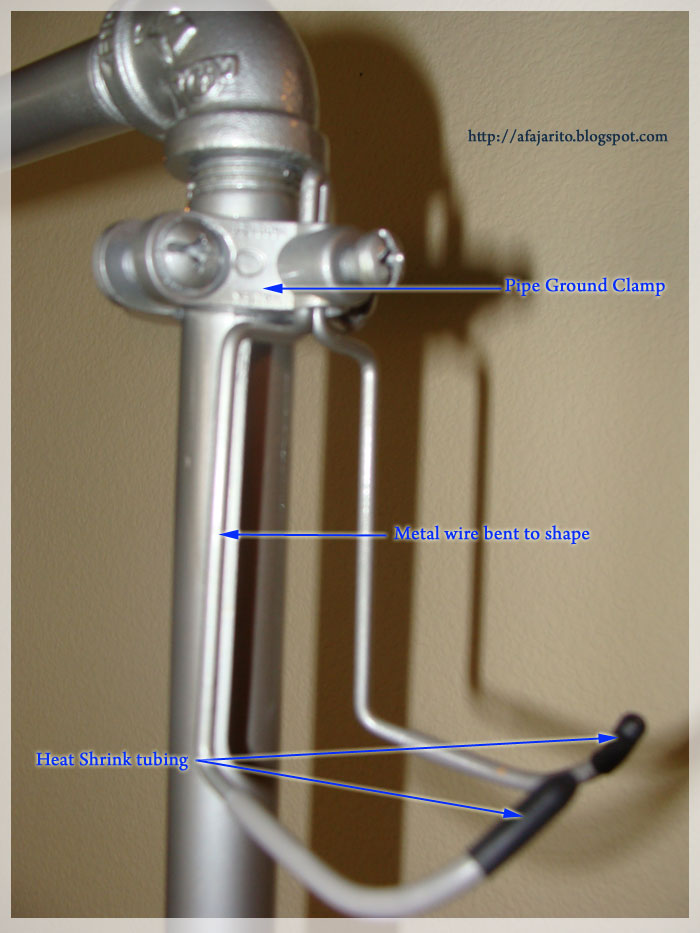
16 inches long steel wire (holder for the steamer nozzle)
some heat shrink tubing
Wood Glue
Paint, wood stain, and Polyurethane protective finish (optional)
4= caster wheels (optional)
Tools you need:
Screwdriver
Pipe wrench
Plier
Hammer
1. First, cut the wood to proper length. Assemble the base as illustarted on the picture below (click to enlarge). Connect each pipe to form an L-shape with end cap on the shorter pipe and the pipe flange on the other end. Paint the assembled pipes and let it dry (optional). Secure the pipe flange on the wooden base about 3.5 inches from base edge.

The portable garment steamer (pictured below).

The 12 inch horizontal pipe will be used for hanging extra clothes during steaming.
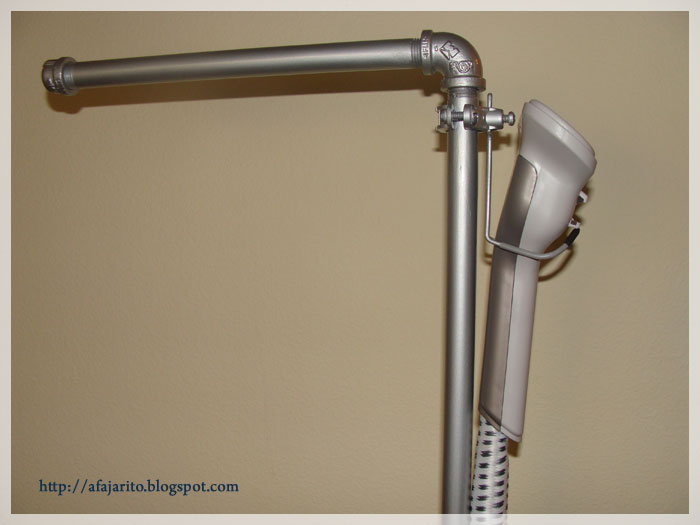
Below illustrates how to make the steamer nozzle hook.
The finished project.

Never thought of making my own stand - thanks for sharing this brilliant DIY idea! I was so close to buying a separate stand but saw your post so you helped me save me some money.
ReplyDeleteAh! Now that's a wonderful idea! When we can Do It Ourselves why bother about spending extra bucks in buying one!
ReplyDelete